


Basic Skin Tutorial
|
|
2 votes |
||||||||||||||||

16) That's all the geometry faked on this portion so now to do the height/specular lighting. Duplicate the base layer with the dodged ridge on it. Use a 65 pixel dodge brush on highlights with a 12 percent opacity. Dodge the middle portion of the wings. Use a burn brush with the same settings except with 8% opacity and burn the outer edges of the wings. It should make it look more realistic and give it a raised feeling.
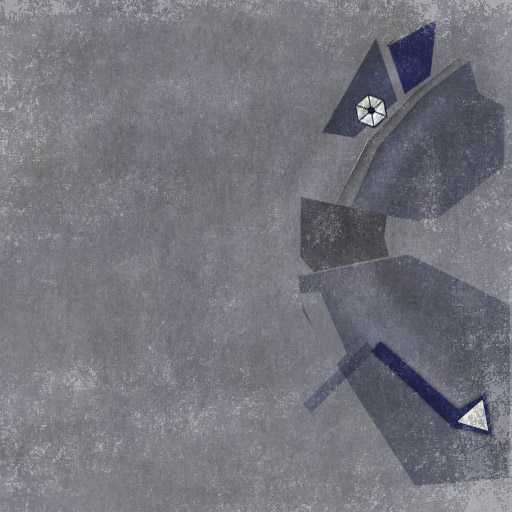
17) That's it for the wing. Let's move onto the cockpit. Take another color sample and overlay that. Then use a 1px dodge brush on highlights with 93% again to dodge the edge of an extrusion on the cockpit. Then burn in some shadows around it.
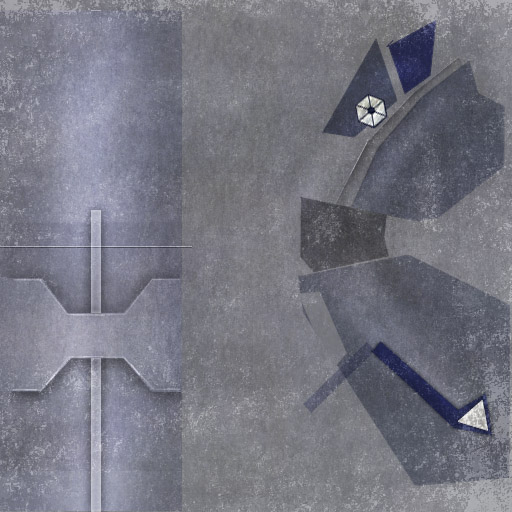
18) Using the same settings on the dodge, move further up and dodge a horizontal line followed by a horizontal burn with the same settings as the dodge directly underneath it.
19) Using the selection marquee (holding alt and dragging on an existing selection will deselect while shift adds to it), dodge two rectangles, above and below the extrusion.
20) Now do the same height effect on this section also.
21) From here on, it should be relatively simple to do the rest of the parts, just repeat what was done for the wing and cockpit for the other sections, changing color where needed, using different shades of whatever color, painting on whatever markings there are.
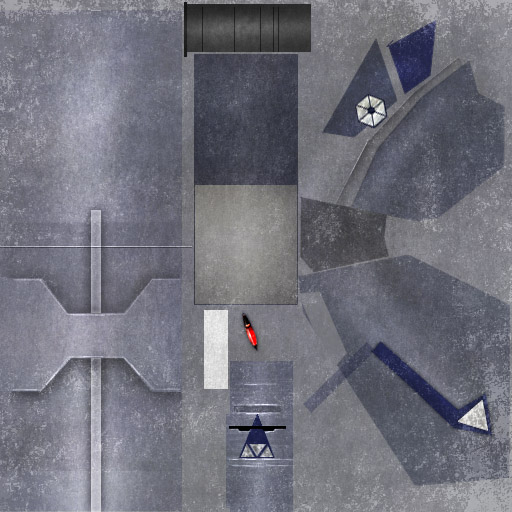
22) Now we get to the eyes. Use the ellipse selection tool (click and hold on the rectangle marquee) and fill it with red. Rotate it. Make the top and bottom edges a very dark grey, almost black and at the beginning of the top part, put a bit of yellow there. Then make a new layer and paint on the gleam of the eye using a low opacity white brush.
That's it, you've made a Trifighter skin! Congrats and good luck with the rest of your skins in the future.
17) That's it for the wing. Let's move onto the cockpit. Take another color sample and overlay that. Then use a 1px dodge brush on highlights with 93% again to dodge the edge of an extrusion on the cockpit. Then burn in some shadows around it.
18) Using the same settings on the dodge, move further up and dodge a horizontal line followed by a horizontal burn with the same settings as the dodge directly underneath it.
19) Using the selection marquee (holding alt and dragging on an existing selection will deselect while shift adds to it), dodge two rectangles, above and below the extrusion.
20) Now do the same height effect on this section also.
21) From here on, it should be relatively simple to do the rest of the parts, just repeat what was done for the wing and cockpit for the other sections, changing color where needed, using different shades of whatever color, painting on whatever markings there are.
22) Now we get to the eyes. Use the ellipse selection tool (click and hold on the rectangle marquee) and fill it with red. Rotate it. Make the top and bottom edges a very dark grey, almost black and at the beginning of the top part, put a bit of yellow there. Then make a new layer and paint on the gleam of the eye using a low opacity white brush.
That's it, you've made a Trifighter skin! Congrats and good luck with the rest of your skins in the future.
 Previous
Comments
Display order: Newest first
Duke - Friday February 22, 2008 - 14:29
Great tutorial Nick! Keep it up 