


Newbies guide to EAW Map Editing
|
|
|
1 vote |
||||||||||||||||
As of late, more and more people have taken up EaW to start mapping. And to encourage those people, I've decided to write a guide on the ins and outs of the map editor.
We begin with a land map. Go into File->New Land. Now the settings are up to you, but for this tutorial we'll be creating a temperate map owned by the Rebels.
Map Context Information
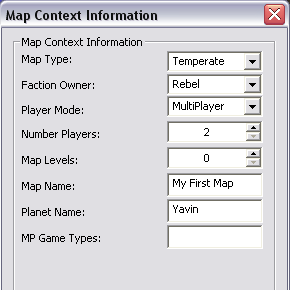
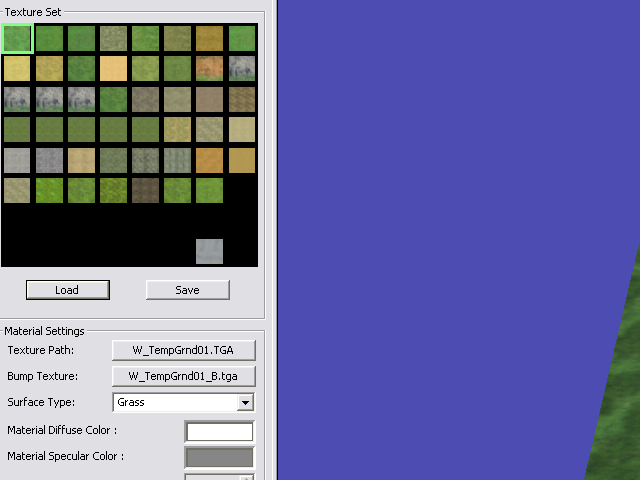
Make sure that your map is in Player Mode 'MultiPlayer', otherwise it will not show in the actual game. Now we're going to load up a nice texture set for the map. Click load, and select "Default_Temperate". Results should look like this;
Your Texture Set
Now that we have a nice temperate texture set. Click on to Height found on the toolbar near textures. Look to the black area on the side editing tools. This is a height map, you can create custom height maps if you please but if you really want to have dynamic results for your map I recommend to use the Additive Code Brush on the top of that menu.
Brush Settings

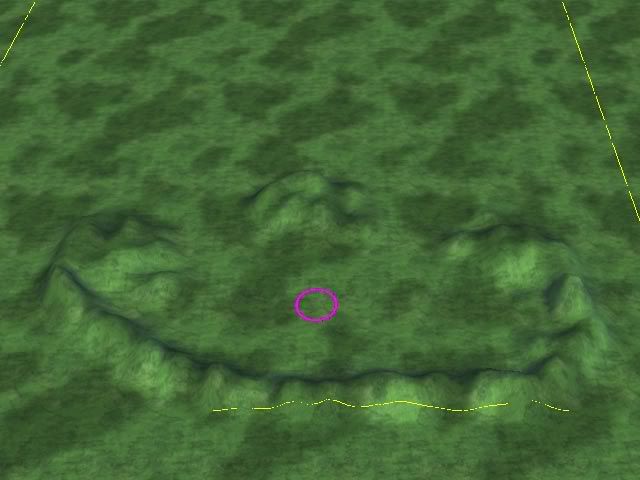
The reason why I put the intensity to 9.00 is that it's much quicker, and more efficent than the standard .10. The radius is also to make it go quicker, and much more effeciently. Now let's go make seperator hills. To create hills, move your mouse over to the 3D port, and start holding down your mouse. Your current height should look like this;
Seperator Hills
Great job. Now lets continue on creating these. This time on the other side of the map. You can scroll to the otherside by holding your right mouse button, or pressing the arrow keys on your keyboard. After your finished making the other seperator hills results should look like this;
The Strategic Points
That's great! We'll be adding content to those hills a little later, but for now we need to change the texture on the hill, to make it look more like a hill. Go into your texture editor, and change your brush settings to this;
The Texture Brush Settings
Now let's paint the texture selected shown above on the hills. If you can't get the entire side, you can rotate your 3D viewport by holding down CTRL and pressing an arrow key in the dirrection of the rotation. Results should look like this after painted;
Finished Paint on the Hills

Nice! Now let's get down to players bases. You'll first need to go into the Objects tab on the toolbar. After your done with that select 'MARKER'. It should unload a whole bunch of crap, but for now we only need 4 things. First of all you'll need to find "PLAYER_0_POSISTION_MARKER". To place object hold down shift, and move your mouse into the 3D viewport, and click. In this case we need it to be placed here;
Player 1's Posistion

Great! But you've forgotten that we have two more things to accomplish in the MARKERS section. Now place the "REINFORCEMENT_POINT_<CIV" on whichever side you think suites that civ. For example in mine I'm doing it like this;
Reinforcement Points

Lookin shweet man! Now we need to create the buildings used by each civilization on either sides of the map. For that, exit "MARKERS" and select "GROUNDBUILDABLE". That should unlock all gameplay buildings in the skirmish maps. For now we'll only be using "IMPERIAL_COMMAND_CENTER_BUILD_PAD" and "REBEL_COMMAND_CENTER_BUILD_PAD". Place like so;
Command Centers
Unfortunately, if you test the game now, the second you begin your command center will explode. We can fix this by selecting a command center on your 3D viewport, and changing the "Starting Object" to '<CIV> Build Site. Like so;
Starting Object
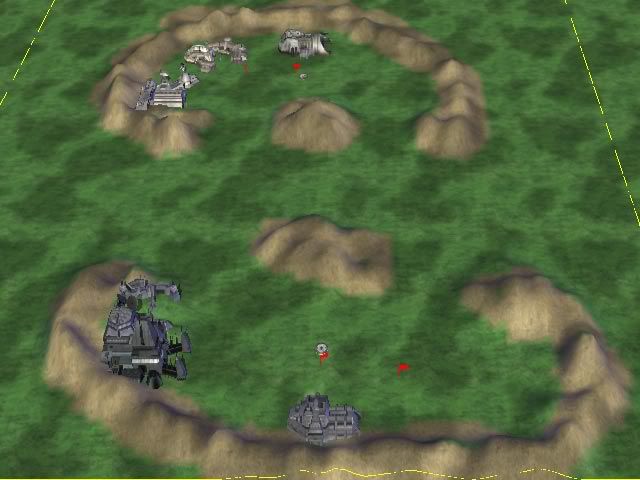
We can now play our map! But it wouldn't be all that fun without Barracks and Light Factories now would it? So place both of them (They go under <CIV-BEGINNING-LETTER>_GROUND_BARRACKS, and <CIV-BEGINNING-LETTER>_GROUND_LIGHT_VEHICLE_FACTORY). Results should look like this;
The Bases
And that concludes this issue of The Newbies Guide to EaW Map Editing.
Tutorial By
Cradossk
We begin with a land map. Go into File->New Land. Now the settings are up to you, but for this tutorial we'll be creating a temperate map owned by the Rebels.
Map Context Information
Make sure that your map is in Player Mode 'MultiPlayer', otherwise it will not show in the actual game. Now we're going to load up a nice texture set for the map. Click load, and select "Default_Temperate". Results should look like this;
Your Texture Set
Now that we have a nice temperate texture set. Click on to Height found on the toolbar near textures. Look to the black area on the side editing tools. This is a height map, you can create custom height maps if you please but if you really want to have dynamic results for your map I recommend to use the Additive Code Brush on the top of that menu.
Brush Settings
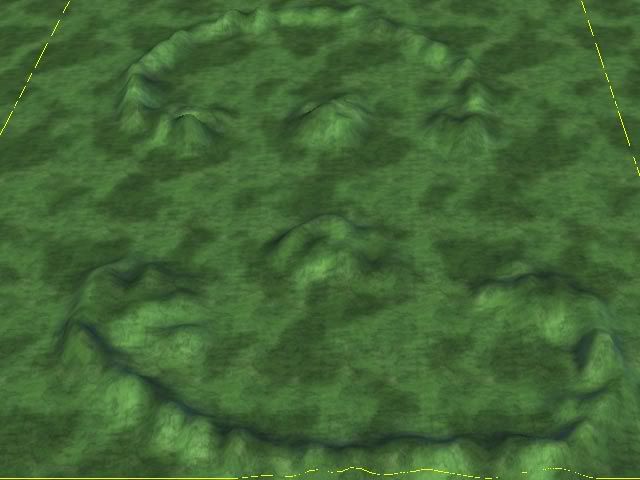
The reason why I put the intensity to 9.00 is that it's much quicker, and more efficent than the standard .10. The radius is also to make it go quicker, and much more effeciently. Now let's go make seperator hills. To create hills, move your mouse over to the 3D port, and start holding down your mouse. Your current height should look like this;
Seperator Hills
Great job. Now lets continue on creating these. This time on the other side of the map. You can scroll to the otherside by holding your right mouse button, or pressing the arrow keys on your keyboard. After your finished making the other seperator hills results should look like this;
The Strategic Points
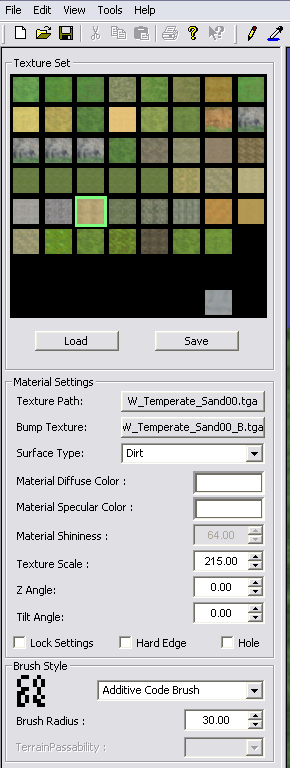
That's great! We'll be adding content to those hills a little later, but for now we need to change the texture on the hill, to make it look more like a hill. Go into your texture editor, and change your brush settings to this;
The Texture Brush Settings
Now let's paint the texture selected shown above on the hills. If you can't get the entire side, you can rotate your 3D viewport by holding down CTRL and pressing an arrow key in the dirrection of the rotation. Results should look like this after painted;
Finished Paint on the Hills
Nice! Now let's get down to players bases. You'll first need to go into the Objects tab on the toolbar. After your done with that select 'MARKER'. It should unload a whole bunch of crap, but for now we only need 4 things. First of all you'll need to find "PLAYER_0_POSISTION_MARKER". To place object hold down shift, and move your mouse into the 3D viewport, and click. In this case we need it to be placed here;
Player 1's Posistion
Great! But you've forgotten that we have two more things to accomplish in the MARKERS section. Now place the "REINFORCEMENT_POINT_<CIV" on whichever side you think suites that civ. For example in mine I'm doing it like this;
Reinforcement Points
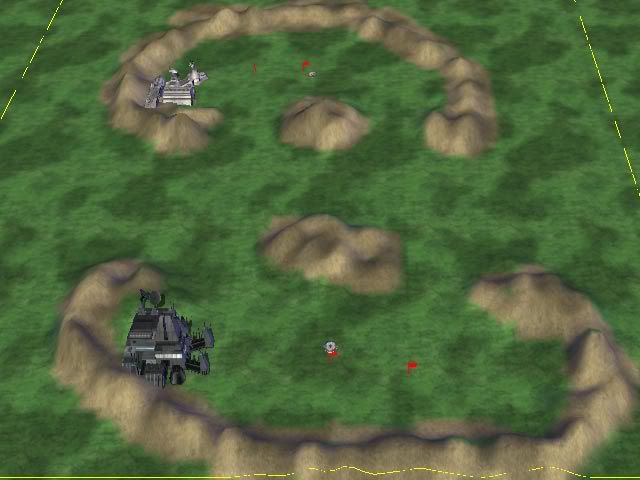
Lookin shweet man! Now we need to create the buildings used by each civilization on either sides of the map. For that, exit "MARKERS" and select "GROUNDBUILDABLE". That should unlock all gameplay buildings in the skirmish maps. For now we'll only be using "IMPERIAL_COMMAND_CENTER_BUILD_PAD" and "REBEL_COMMAND_CENTER_BUILD_PAD". Place like so;
Command Centers
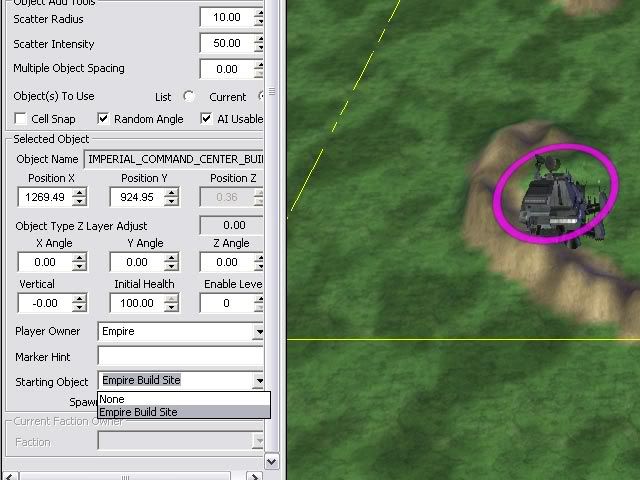
Unfortunately, if you test the game now, the second you begin your command center will explode. We can fix this by selecting a command center on your 3D viewport, and changing the "Starting Object" to '<CIV> Build Site. Like so;
Starting Object
We can now play our map! But it wouldn't be all that fun without Barracks and Light Factories now would it? So place both of them (They go under <CIV-BEGINNING-LETTER>_GROUND_BARRACKS, and <CIV-BEGINNING-LETTER>_GROUND_LIGHT_VEHICLE_FACTORY). Results should look like this;
The Bases
And that concludes this issue of The Newbies Guide to EaW Map Editing.
Tutorial By
Cradossk